Showing posts with label diy. Show all posts

Tuesday, June 25, 2013

Homemade Baked Potato "Chips"


I have been trying to find a good chip recipe for a while now, but I couldn't find one that seemed to work, so I made my own! I'm not saying that this might work for everybody, so you may need to create your own too, but this is how I finally got mine to work.

 I made two different kinds, crunchy chips, and soft potato slices.

for the Potato Slices:
Idaho potatoes
Montreal Steak Seasoning
Olive Oil
Cheddar Cheese

-Preheat your oven to 375F
-Wash your potatoes, you can choose to peel them if you'd like. The skin actually has vitamins and nutrients you don't get with just the potato inside.
-Slice your potato about 1/4in thick
-In a large bowl add the potatoes and mix with the olive oil, and pepper seasonings until nicely coated. You can add other seasonings depending on your taste. I did a batch with chili powder too.
-On a cookie sheet, lay out the slices flat, don't overlap the slices, but they can touch.
-Bake in the oven for 20 minutes without flipping.
-Once finished, place on a paper towel to absorb any left over oil or juice and  immediately add cheese. This gets the cheese nice and melted.


Now for the chips! This one was a bit difficult, but they were delicious.

Idaho Potatoes
Sea Salt
Pepper
Herb Seasonings
Olive Oil


-Preheat Oven to 400
- Slice the potatoes about 1/4in thick or smaller.
- This time, do not mix in a bowl, instead take a paper towel and dip in olive oil. Spread the olive oil over the cookie sheet, you don't want the potato to soak up the oil this time, you just want the potatoes to not stick and have a light olive oil flavor.
- Lay the slices out on the sheet nice and flat
- Sprinkle the salt and pepper and any other seasonings you like.
- Bake for 15 minutes, take out and flip for another 15 minutes
- Once they "brown" they are nice and crispy and ready. No they are not burnt or taste burnt, I just like them extra crunchy.
-Immediately start taking them off the hot sheet and transfer them to a paper towel to cool. The longer you wait, the harder it will be to get the hard chip off the pan.

Enjoy =]

Decorated Makeup Drawer Box: Revamp Your Storage!


As we are getting ready for summer, and summer vacations, It's always fun to clean out everything. I like to clean everything out with each season, instead of just "spring cleaning". I clean my closet and storage beds and move all the furniture and clean out all the drawers in the house. When it came down to my makeup, I REALLY needed some major cleaning. I also wanted to make my box look less tacky and make it match my bedroom more. The room is a pale pine green, pale blue, cream, and dark brown. When I saw the green paper I knew exactly what I was going to do with it! Lets get to it:


 Materials:
Cleaning Supplies (my makeup and makeup box needed cleaning bad!)
Scissors
Glue
Craft Paper, I used scrapbooking paper
Plastic Drawer Organizer

 Here is a lovely before shot..

Clean EVERYTHING!

 It's always nice to have nice clean things to work with, since you're about to make the box all pretty, your make up should be nice and clean and pretty too!

 Hello my name is Paige and I have a makeup fascination.


 Okay, once everything is clean, lets start making the drawers pretty!

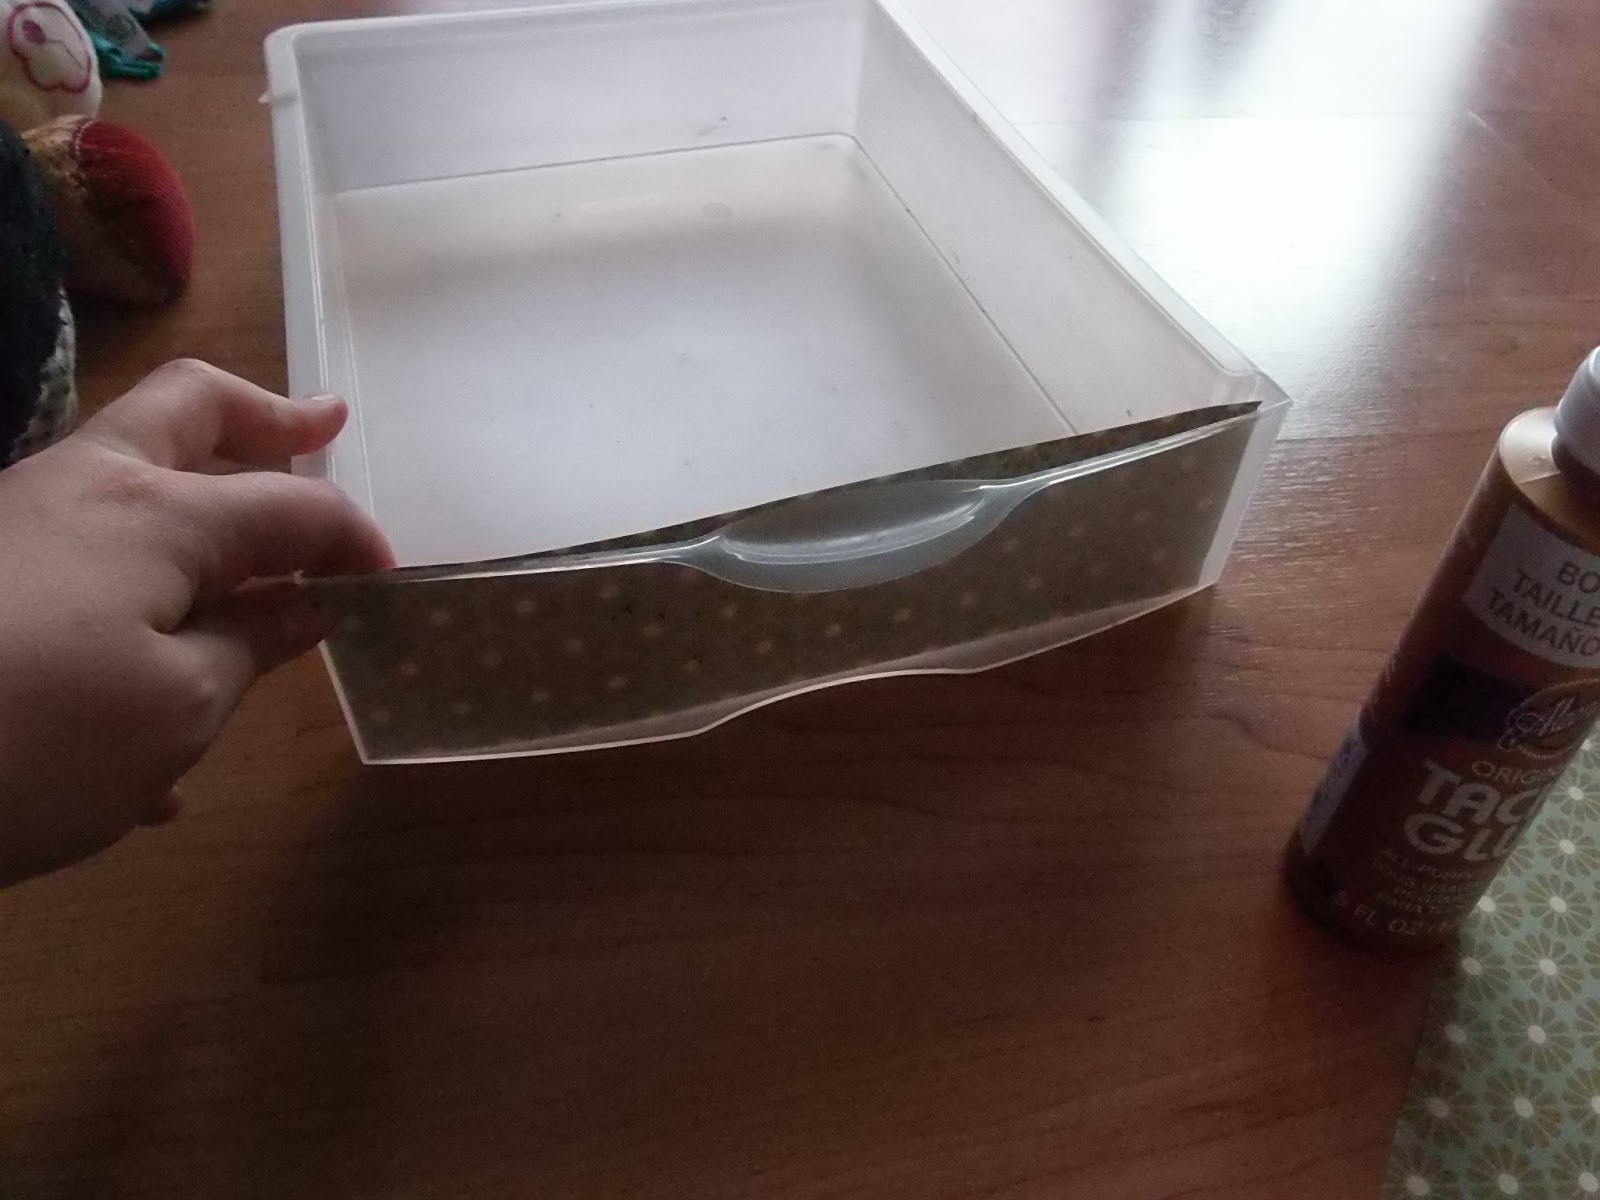
 Cut strips of paper to fit BEHIND-
-The front of the drawer.

  Glue around the edges on the FRONT of the paper so you can glue BEHIND the front of the drawer. Hot glue would have been a lot quicker, just a helpful tip.

 Hold in place until kind of secure.

 Because I wasn't using a quick drying glue, I used some clothes pins to hold the paper in place for the glue to dry

 Do this to the front and the back panels of each drawer

 Now go ahead and start organizing your makeup. I had one drawer for lips- lipstick, gloss, chapstick, lip moisturizer, etc. one drawer for face- blush, foundation, concealer, powders, bronzer. and one for eyes- eyeshadow, eyeliner, mascara, eye gels, eye whatevers.

 and here is the finished one! it looks so much better than what it did, you can still see the glue (it wasn't completely dry yet but I was ready to take pictures!) and all my makeup brushes I put into a different container, which I will post later!

Friday, May 31, 2013

Easy Mini Frozen Yogurt Pops Made From Recycled Creamer Cups


These little yogurt pops were very easy and great for little kids who like to make a mess with the larger popsicles. I had a bunch of old creamer cups laying around and I didn't want to throw them away because I knew I would want them for something because of how many I had. Using them for these yogurt pops made them the perfect size for little almost-two-year-old mouths, and they're really no bigger than a lollipop, and are much healthier (and cheaper!) than buying the artificially flavored popsicles.

So let's get started!

What you need: 

Real fruit yogurt, you can use fruity store bought or use a big tub of plain yogurt and blend up your favorite fruits for a smoothie flavored pop
Creamer cups

Popsicle sticks, lollipop sticks, skewer sticks.. here I used what little bit of toothpicks I had left and just cut off the pointed edges.

A spoon


What to do:


 First make sure you clean/rinse out the creamer cups pretty well


 Fill up your cups as much as you can, without going overboard


Tap the cups on a hard surface a couple times to flatten out the yogurt and release any air bubbles. This insures the yogurt is packed nice and tight and will freeze solid.

 Repeat those steps for every cup you are using.

 Next, take your sticks and insert them into the centers


 If you packed them down well enough their sticks should stand up straight without falling over or being lopsided.

Then freeze 'em! A good hour or so should get the job done.

With them being creamer cups, they should pop out quite easily, you might have to give the bottoms a little push, but they all popped out fairly easily for me.

Please don't mind my one speck of nail polish left.


My daughter loved them soo much she kept running away from me because she didn't want to share!
This is also right after she had fallen down and was crying, so I thought it was the perfect time to make her feel better with some yo-pops. =]

 Enjoy!


Wednesday, May 22, 2013

Pudding Filled "Funfetti" Cupcakes


Oh hello delicious.
Okay...So my phone decided to go on the fritz while I was making these, so all of the picture I took of how to actually MAKE them...kinda didn't save. I will still post the recipes but other than that, just enjoy the delicious looking finished pictures.

For the cake - 
Ingredients:

3 cups flour
1 3/4 cups sugar
1 Tbsp baking powder
1 tsp salt
1 cup butter (softened)
4 egg whites
1 1/4 cups milk
2 tsp vanilla
multicolored sprinkles 


-Preheat the oven to 350 and line your cupcake pan with liners.
-Sift all the dry ingredients together into a large bowl.
-Add half the butter and mix with a mixer on low. Add the other half and mix well until it resembles a sandy texture.
-Beat in the egg whites on medium
-Add milk and vanilla and beat on medium for about two minutes.
-Add Sprinkles 
-Pour batter into cupcake liners a bit more than half way full.
-Bake for about 18-20 minutes until a toothpick comes out clean.
-Let cool

Adding The Pudding
1 package Instant 5 minute pudding

Follow the directions on your package for your pudding.

-cut a hole in the center of your cupcakes. I used the bottom of a large cake decorating tip. Don't cut all the way through the cupcake. remove the cake that you punched out.
-fill a baggie with the pudding and pipe the pudding into the cupcakes until completely filled.
-Instantly top with frosting (I used a store bought butter cream with food coloring to save time)
-Let chill in the fridge until the pudding and frosting are set

Enjoy!


Paper Party Lantern Craft

I recently had a small "Luau Party" of sorts.. that I never thought to get a picture of. I did however get few pictures of the awesome lanterns I made spur of the moment. I was originally going to have these sitting out on a side table but when my almost-two-year-old decided she was in love with them, they needed to go somewhere a bit higher out of her reach.
 
Please excuse the popcorn ceiling and brown wood and powdered blue and very off white door. We just moved in a couple weeks ago and haven't gotten around to painting anything. That will be in another post, it will be too shocking of a change for it to not be!

Anyway, back to the lanterns. Now I had done this craft wayyy back in kindergarten, so I am pretty proud of myself for even remembering how to do it. Since this is a easy craft, it would be perfect for a kids craft or a classroom party craft or even as a game for kids to do at a birthday party.

What you need are:
Cardstock or construction paper
Scissors
Glue
Hole Punch
Ribbon or string (if you intend on hanging them)

Step one! Gather materials. Obviously.

Step two! Fold your Piece of paper in half vertically. Like a take-out menu. So LONG not SHORT


Step three! Start making  about one inch snips all the way up the paper on the folded side, leaveing about an inch to an inch and a half of room at the top. That is where you will glue the two sides together. So do not cut all the way off the paper. Or you'll just have strips of paper ;]


Fourth step! Cut through out the paper. They don't have to be even lines, you can't completely tell once the lantern is completely assembled.


Step five! Open up your folded paper and on one side dab a couple dots of glue.

Fold over the other side and hold in place until the glue is either dried or tacky enough to hold itself.

And there you have it, a lantern! You can push down a little on the top while its standing to give it a more bulky look if you prefer the fat lanterns.


Now I was originally just going to have them standing with tea candles in side, but since I needed to move them out of the way, I punched two holes on opposite sides of the lantern and tide a piece of skinny ribbon between both to give it a handle for hanging.


oh I cannot wait to paint these walls...


- peaceful crafting =] -

Wednesday, March 13, 2013

DIY No-Sew Bows

In the midst of preparing for moving, I've been in a very DIY house happy mood. As I was packing up (or more correctly, pulling everything out and thinking about packing up) my craft room things, I found a bunch of old scrap fabrics. Now I always keep my scraps and sometimes feel a bit like a hoarder because I really like recycling my things, especially if it ever cost a pretty penny. That being said, I tried to decide what to do with some scrap fabrics...and with a one year old girl running around with a big pink hat on her head, what better than to make big bows for her head too.

So here is my DIY no-sew bow tutorial, and I am very happy to report how lovely I thought these bows came out.

What You Need (or what I used) :
-Craft glue
-Hot Glue
-Scrap Fabric
-Scissors
-Toothpicks (optional)


Sorry some pictures decided they want to remain sideways

So pick your fabric ...

And cut out a chunk of it. The bigger you cut, the bigger your bow. I live the floppiness of this fabric and thought it would make a neat large floppy bow, so I cut mine larger than the rest I made.

I put some glue into the cap and had a toothpick to smear the glue on the fabric. More accuracy and less globs.

Depending on if you cut a square or a rectangle, you're going to glue down the raw ends. Basically hemming the ends so it has more of a neat finish. I cut this one in a square-ish shape, so I smeared three spots of glue on two opposite edges...

And then folded them over, only about 1cm so its only an edge.

Now both sides have smooth edges

Flip the fabric so the two raw edges are vertical, and find the center between both finished edges that should be horizontal

And add a dab of glue to both sides.

Fold the bottom and place the raw edge on the dabs of glue

Add a little more glue

And do the same to the other raw edge end.

Now you can scrunch the middle and it starts looking like a bow.

Make sure the ugly end (the end with the seams showing) is facing you and make a little pinch fold.

Add a little glue between the fold you pinched.

Pinch and glue a few more and it should hold like a bow now.

Cut a bout 2in long piece of fabric. This goes in the middle.

Now I use my hot glue gun to make sure the middle holds together tightly. Add a dab of hot glue to the center of the bow

And press one edge of the new cut fabric strip onto it.

Wrap it around and around until your out of fabric and hot glue the end.

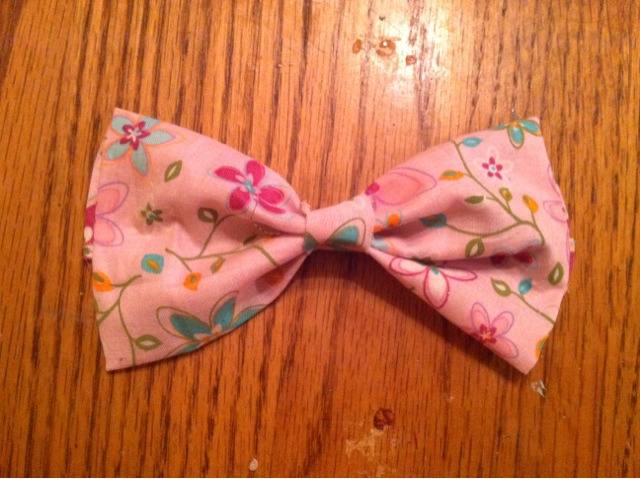
Now you have a bow!

Now if you want to make hair clips, get some plain cheap hair clips. These snap ones I like most when using them for my daughters curly hair.

Open the clip and on both sides add a dab of hot glue

And press it to the bavk /ugly end of the bow. If you opened the clip, it makes this part easier so it sits better.

Once its dry you have a lovely bow.  This is my daughter wearing the big bow. She was watching a Disney movie and couldn't be bothered with me taking a picture ;p

I love these little things. I especially like the polka dot ones and use then to hold my hair back while cleaning! Don't think you can ever get old enough to not wear bows. Unless of course you're a guy :-) 

~peace and crafting!~